

In this blog , lets see the steps to be implemented to enable Single Sign On using ADFS and SCIM integration in Snowflake
Single Sign On :
Companies using single sign-on to grant end-users access to their applications notice a wide range of benefits for themselves, their employees and their customers. Some of the biggest problems SSO solves are that it:
Makes your systems more secure, and decreases attack surfaceSaves your IT team time and money from automation, integration, and password resetsImproves end-user experience, for both employees and customersIncreases productivity, even when working remotelySimplifies integration with B2B partners
How Single on works:
There are multiple ways to implement SSO in Snowflake. Below are the most utilized
Okta SSOADFS SSO
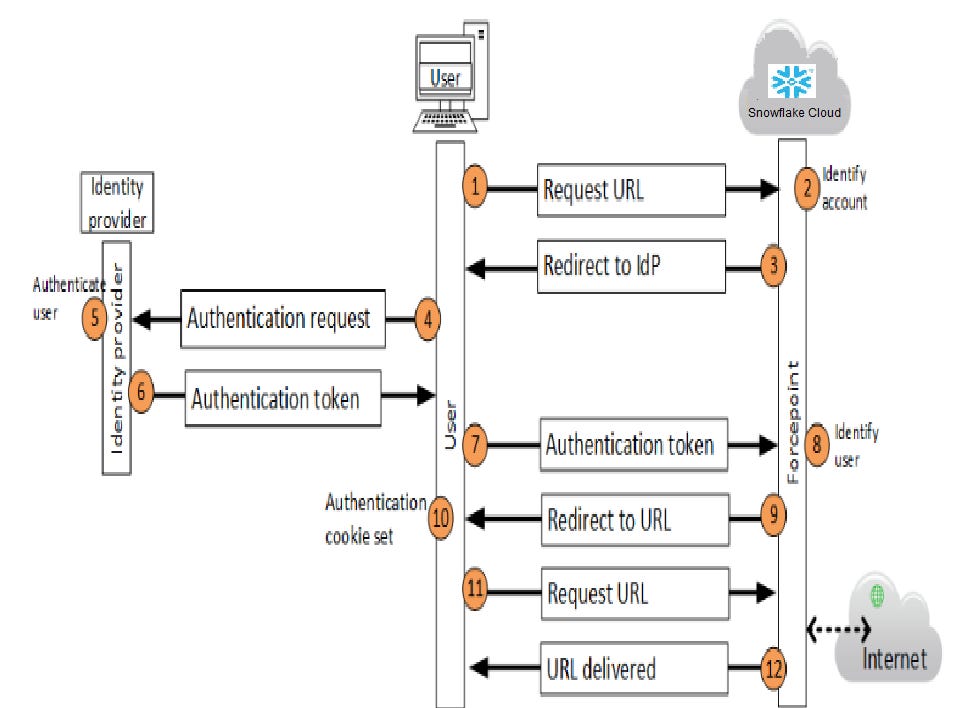
In our engagement we did implement SSO using Azure ADFS and below are the steps we followed in sequence to successfully enable SSO
Configurations in Azure :
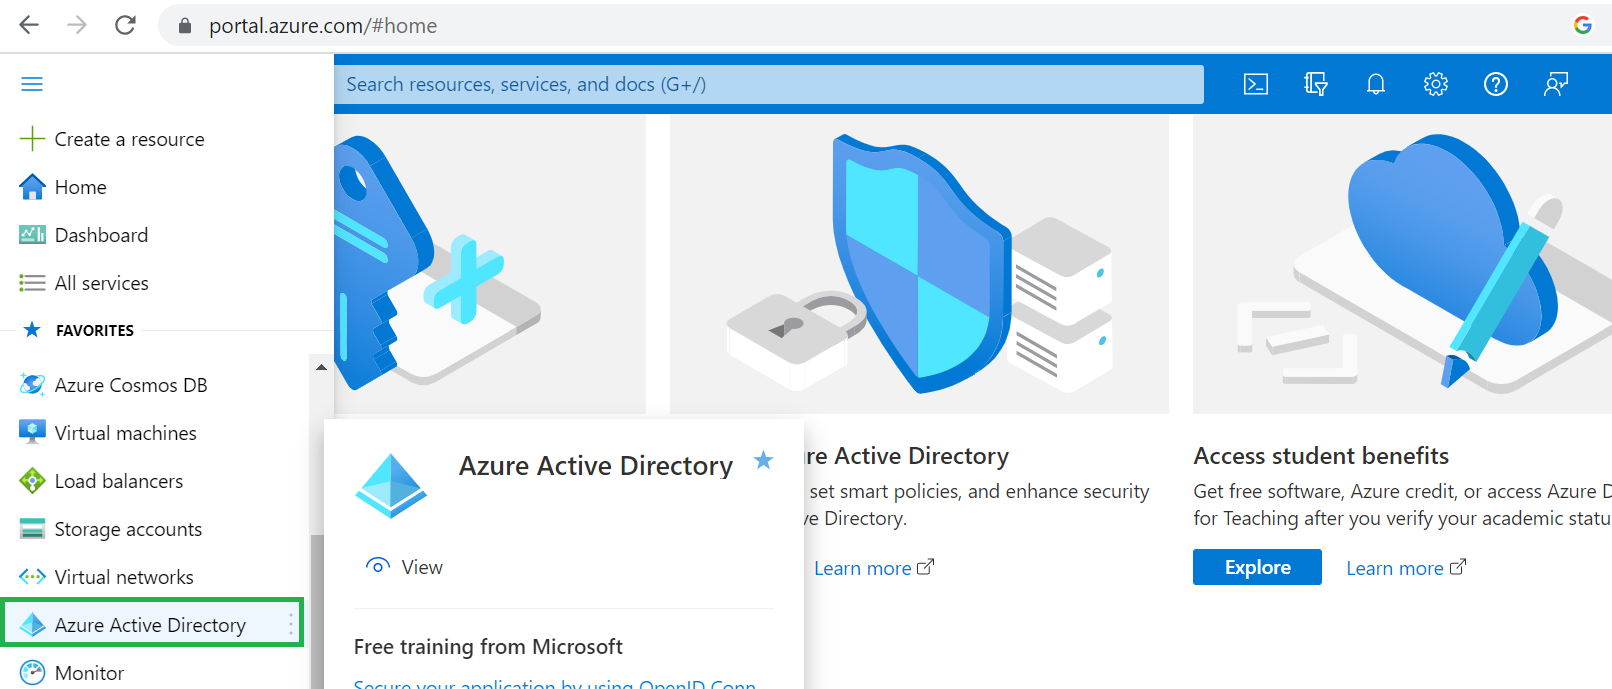
Sign in to the Azure portal using either a work or school account, or a personal Microsoft account.On the left navigation pane, select the Azure Active Directory service
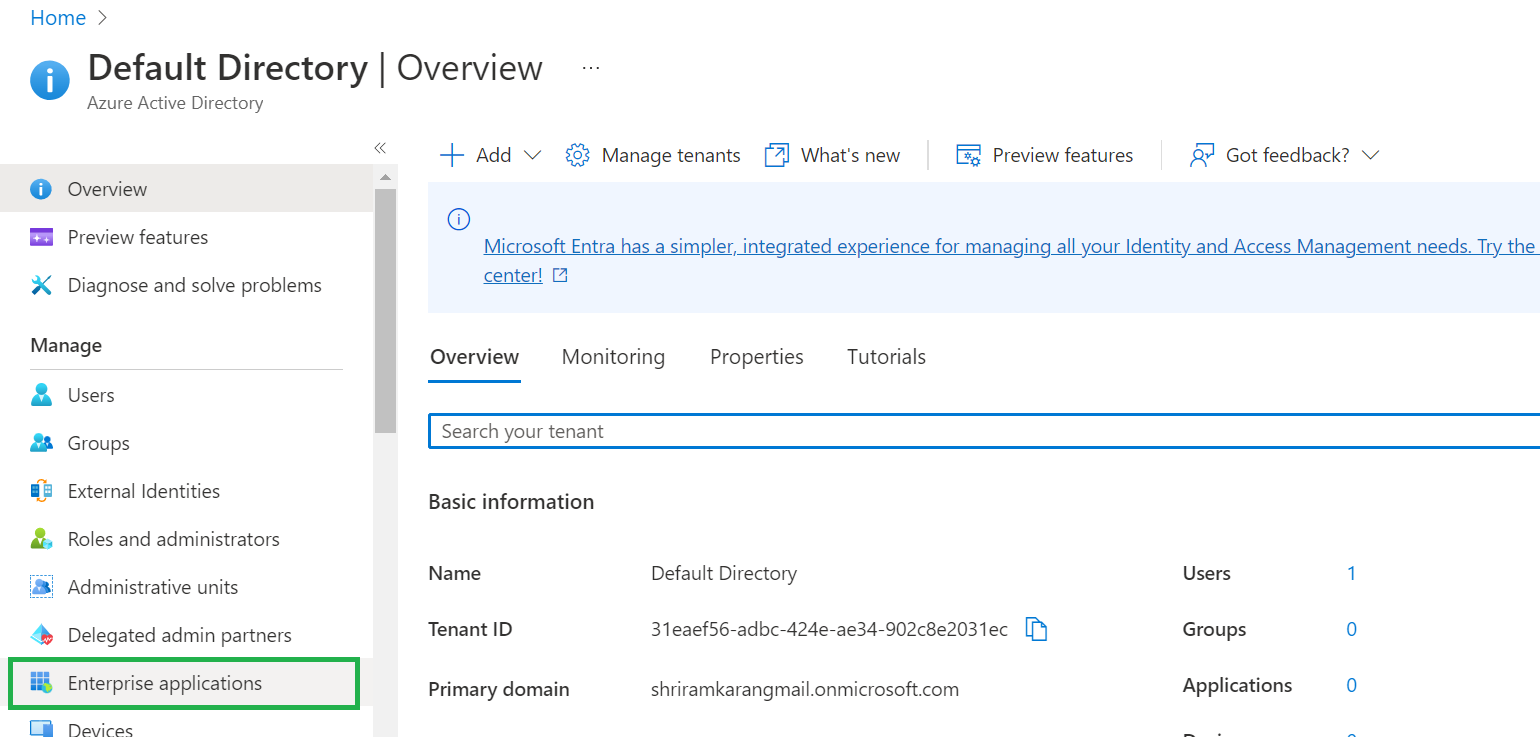
3. Navigate to Enterprise Applications and then select All Applications.
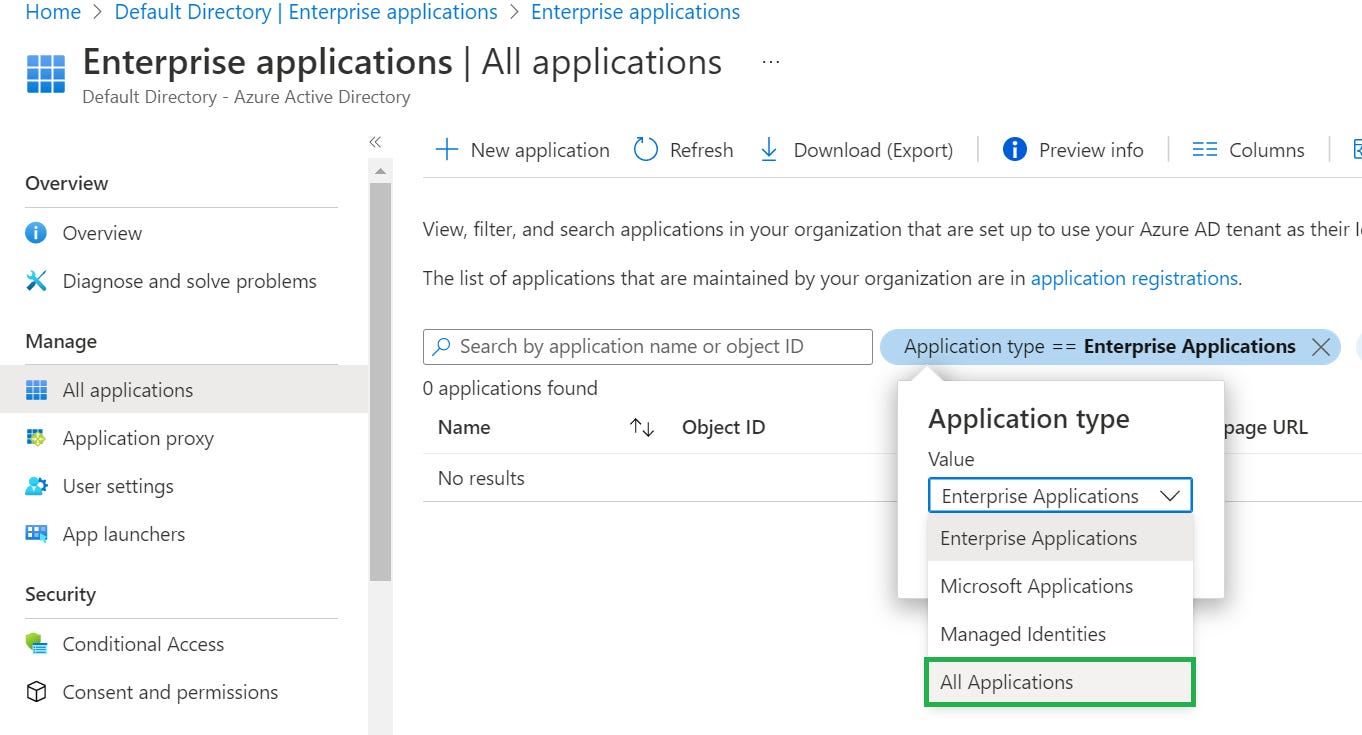
To add new application, select New application.In the Add from the gallery section, type Snowflake in the search box.
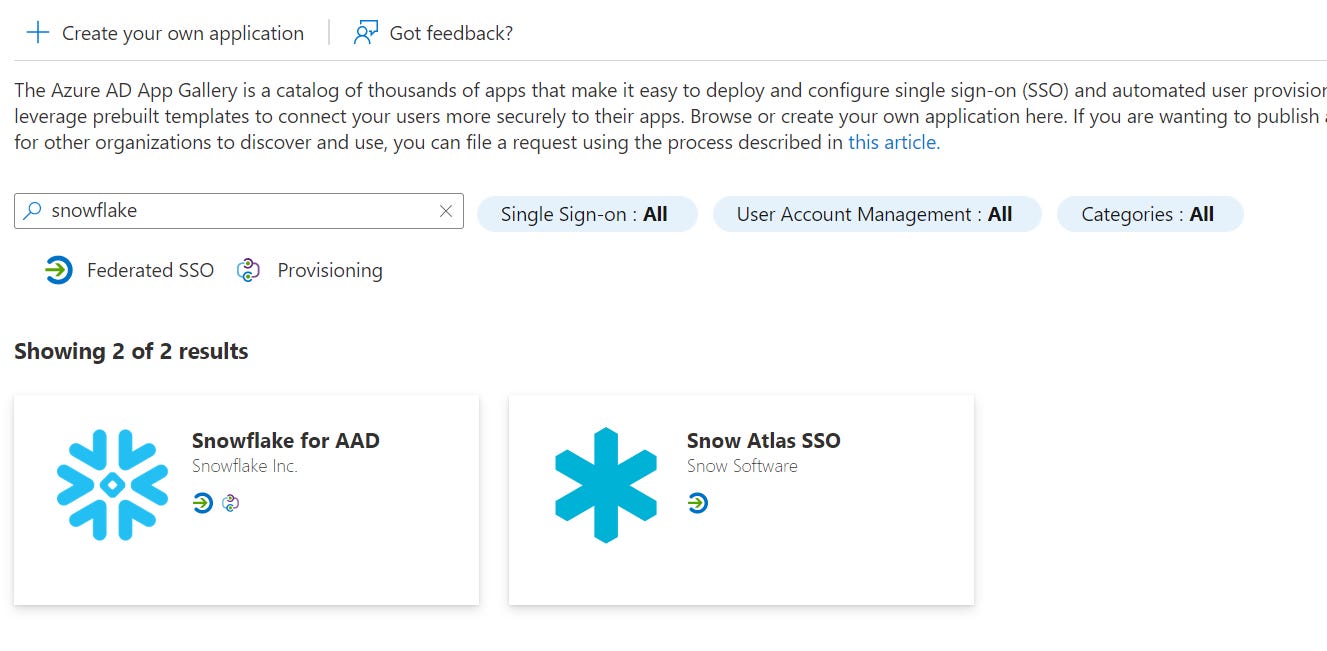
6. Select Snowflake for AAD from results panel and then add the app. Wait a few seconds while the app is added to your tenant.
Once Snowflake App is added follow the below steps
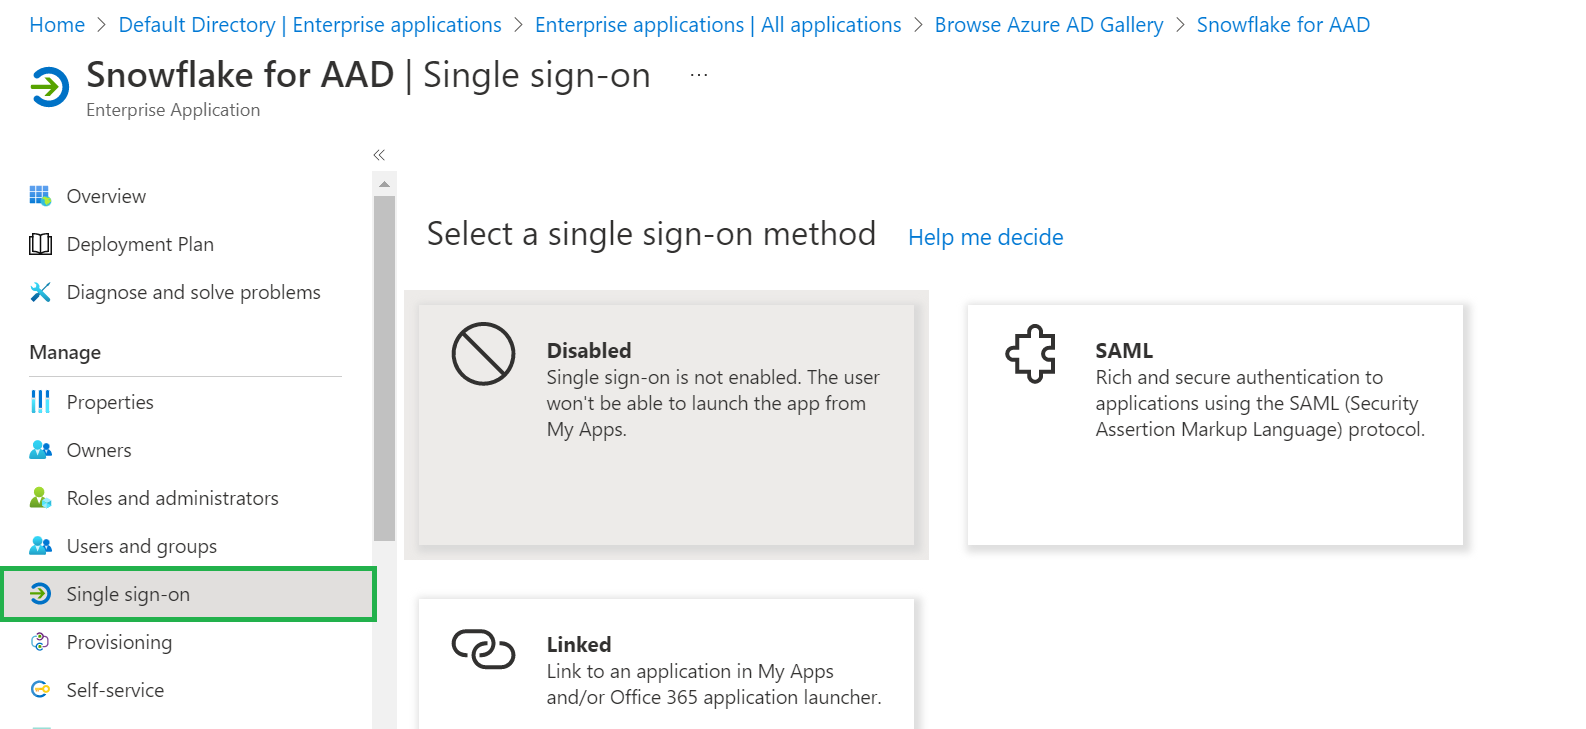
In the Azure portal, on the Snowflake application integration page, find the Manage section and select single sign-on.
On the Select a single sign-on method page, select SAML.On the Set up single sign-on with SAML page, click the pencil icon for Basic SAML Configuration to edit the settings
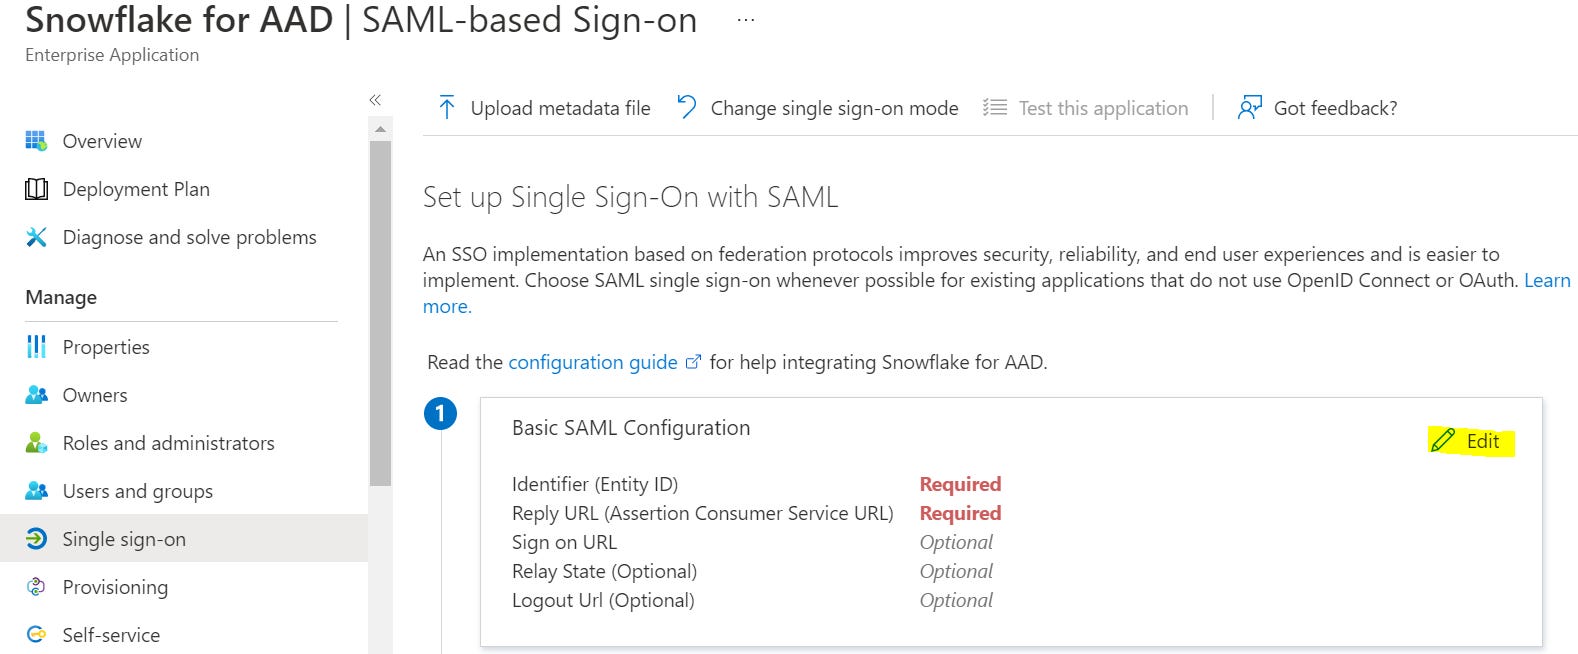
4. In the Basic SAML Configuration section, perform the following steps, if you wish to configure the application in IDP initiated mode:
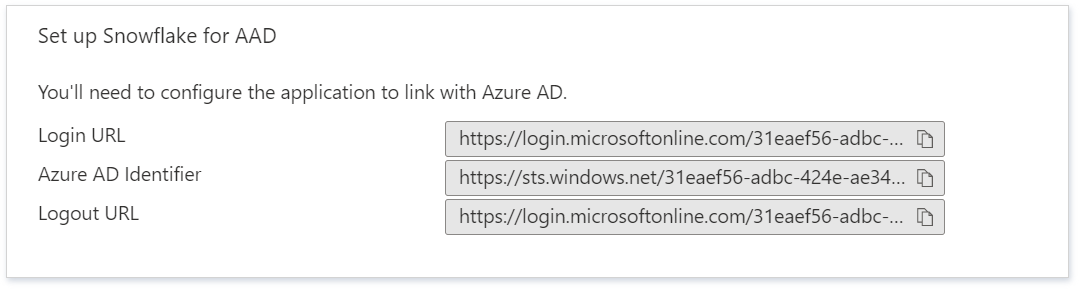
a. In the Identifier text box, type a URL using the following pattern: https://<Account-name>.snowflakecomputing.com
b. In the Reply URL text box, type a URL using the following pattern: https://<Account-name>.snowflakecomputing.com/fed/login
5. Click Set additional URLs and perform the following step if you wish to configure the application in SP initiated mode
a. In the Sign-on URL text box, type a URL using the following pattern: https://<Account-name>.snowflakecomputing.com
b. In the Logout URL text box, type a URL using the following pattern: https://<Account-name>.snowflakecomputing.com/fed/logout
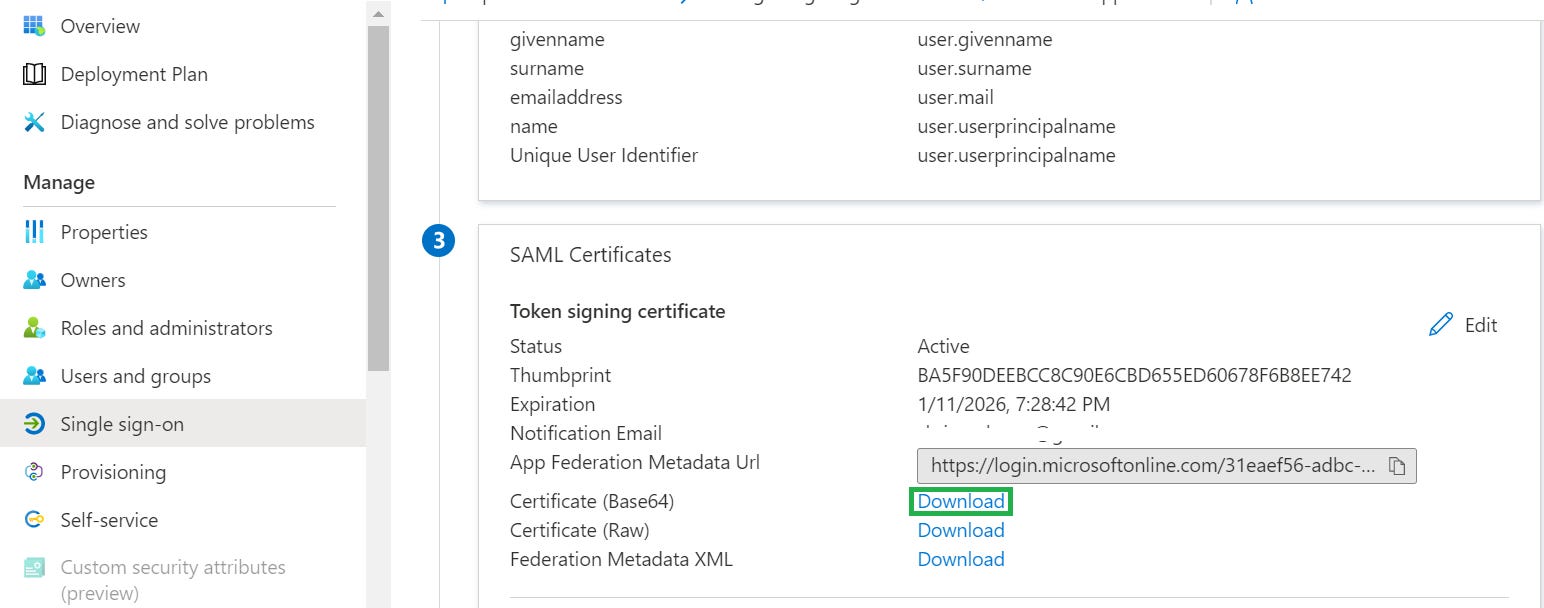
6. On the Set up Single Sign-On with SAML page, in the SAML Signing Certificate section, click Download to download the Certificate (Base64) from the given options as per your requirement and save it on your computer.
7. On the Set up Snowflake section, copy the appropriate URL(s) as per your requirement.
Configurations in Snowflake:
Login to Snowflake usingACCOUNTADMINrole.Open the downloaded Base 64 certificate in notepad. Copy the value between “-----BEGIN CERTIFICATE-----” and “-----END CERTIFICATE-----" and paste this content into the SAML2_X509_CERT. (Note : Paste the content in single line without any spaces)In the SAML2_ISSUER, paste Identifier value, which you have copied from the Azure portal.In the SAML2_SSO_URL, paste Login URL value, which you have copied from the Azure portal.In the SAML2_PROVIDER, give the value like CUSTOM.Your query would look like below

Note : Initially when we tried with SAML2_SNOWFLAKE_ISSUER_URL and SAML2_SNOWFLAKE_ACS_URL parameter , the SSO button was not enabled when hitting the Snowflake URL but after configuring the Security Integration using these parameters all the users were able to login using Single Sign On
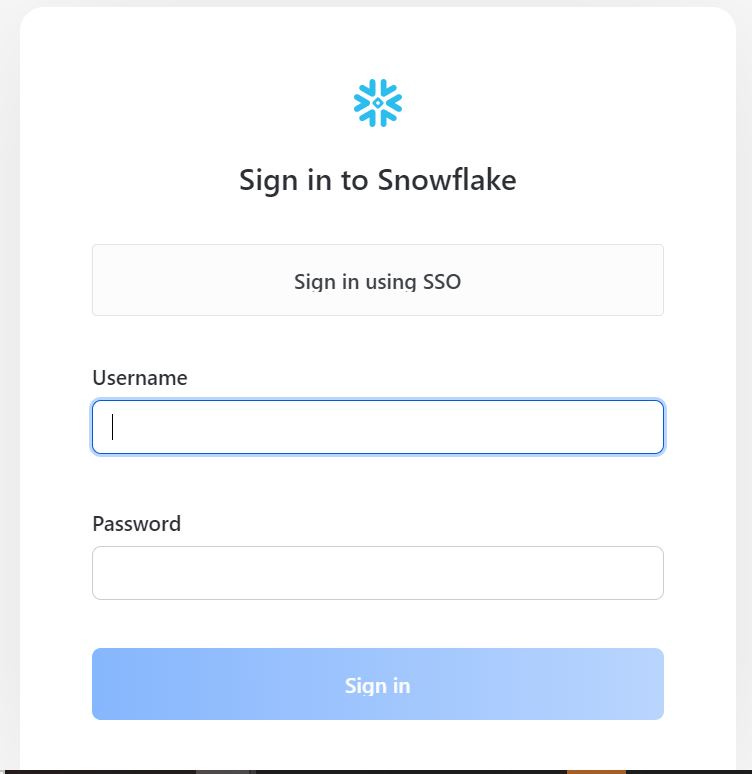
If the SSO is set properly , you should see a screen similar to below
SCIM Integration:
SCIM, or System for Cross-domain Identity Management, is an open standard that allows for the automation of user provisioning. SCIM communicates user identity data between identity providers and service providers requiring user identity information
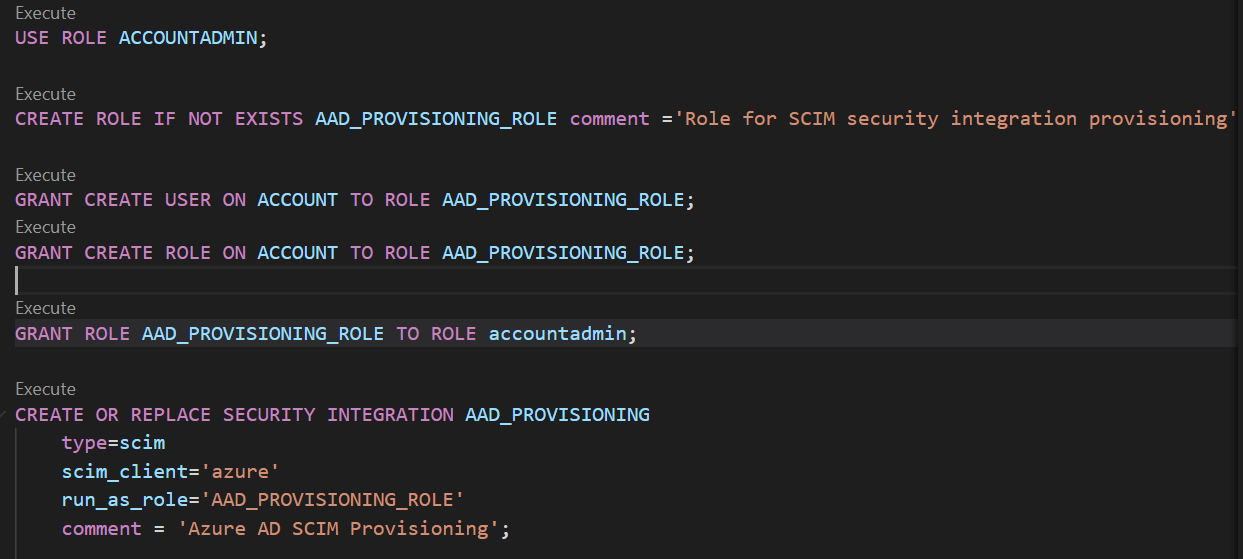
Use the ACCOUNTADMIN role.Create the custom role AAD_PROVISIONING_ROLE. All users and roles in Snowflake created by Azure AD will be owned by AAD_PROVISIONING_ROLE.Provide grants to create users and roles to the role AAD_PROVISIONING_ROLE
4.Create and copy the authorization token to the clipboard and store securely for later use. Use this token for each SCIM REST API request and place it in the request header. The access token expires after six months and a new access token can be generated with this statement.

Note:
Enabling SCIM integration for user creation does create the user with passwords so enabling SSO is recommended option
In the automated user creation , it is also possible to map the attributes these will help to create the users with certain default roles and default warehouses.